

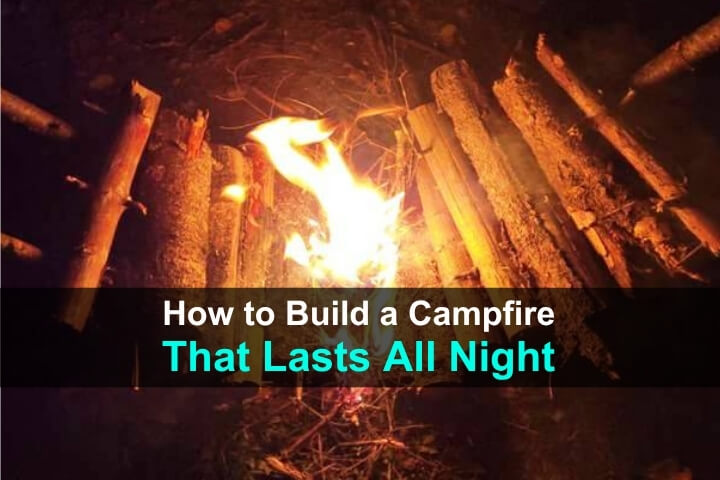

A self-feeding fire is a bushcraft marvel that takes the outdoor experience to a new level, particularly when camping. It’s a strategically built fire set-up designed so the logs burn and collapse in a way that feeds the fire over time.
What makes it truly remarkable is its ability to burn for several hours unattended, freeing up campers to focus on other tasks or enjoy a restful sleep. The practicality, convenience, and extended burn time make it an essential skill for any wilderness enthusiast.
Want to save this post for later? Click Here to Pin It On Pinterest!
The Effectiveness of a Self-Feeding Fire
Through ingenious use of the fire triangle principles (oxygen, heat, and fuel), a self-feeding fire maintains itself throughout the night. The vertically stacked logs provide ample fuel, which, as they burn and collapse, perpetually feed the fire. Utilizing gravity, the topmost logs slowly descend, maintaining the heat at the fire’s core.
At the same time, gaps around and between the logs ensure that oxygen reaches the flames, essential for continued combustion. This well-tuned combination of elements creates a self-regulating, long-burning fire.
Use this type of fire in winter conditions to keep a steady heat warding off the chill. In wet weather, it may take a bit of time to get started but the high heat will keep it burning, even in a drizzle.
Step-by-Step Guide to Building a Self-Feeding Fire
Despite its sophisticated design, setting up a self-feeding fire is not as daunting as it may seem, and with the following step-by-step guide, you’ll be able to build one with relative ease.
1. Shaping the ramps: Begin by finding 4 branches at least 2 inches in diameter.
They should be roughly the same length.
2. Sharpen the ends so that they can be driven unto the ground.
3. Position and install ramps: Drive 2 into the ground to form a V-shape.
Do this for the other two as well.
This structure should resemble a chute, with the highest point no more than hip height. Load the ramps with your fuel logs.
4. Igniting the Fire: After setting up your ramps and fuel, the next step is to ignite a small fire at the base of the combined ramp. This is best achieved with a bundle of dry tinder and small sticks, not thicker than your thumb. A spark from a firesteel, match, or lighter should be enough to ignite the tinder.
5. Building a Base of Embers: As the fires on the ramps burn, they will start producing a base layer of embers. Maintaining these initial fires is crucial. Gently feed them with additional small sticks and kindling until a substantial bed of red-hot embers forms at the base of your ramp structure.
6. Monitoring and Maintaining the Fire: Despite the self-feeding mechanism of this setup, it’s essential to keep an eye on the fire. There is always a chance that the ramp sticks might catch fire, which could disrupt the entire process. If you notice any signs of this happening, intervene promptly to prevent potential mishaps and ensure a continuous, controlled burn.
As the bed of red-hot embers becomes larger, it will slowly start to engulf the supply of logs. As your fire starts to burn down, add more logs to the ramps.
Choosing the Best Wood for a Self-Feeding Fire
Not all wood is created equal, and for an efficient self-feeding fire, choosing the right type matters; hardwoods are the best choices due to their high heat output and slower burn time.
- Oak: Renowned for its density, oak is a top-tier choice for firewood. Its high BTU (British Thermal Unit) output makes it excellent for long-lasting, hot fires.
- Birch: The best contender when it comes to easy ignition, birch is ideal for getting your fire started. Birch bark, rich in natural oils, can even be ignited when damp, making it an invaluable resource in wet conditions. However, birch burns quickly, so it’s best used in combination with slower-burning wood like oak.
- Ash: Ash is a bushcraft favorite. Known as the ‘king of firewood,’ it burns steadily even when green, thanks to its low moisture content. Ash produces a steady flame and consistent heat output, making it an excellent all-around choice.
- Pine: Pine is a common conifer species that is readily available in many areas. It lights easily and burns quickly, producing a moderate amount of heat. It’s often best used for outdoor fires or mixed with other hardwoods for indoor use.
Starting the fire with pine is best as it’s easy to start. Use a hardwood for the larger logs on the ramps to ensure they burn all night.
Tips for Improving Your Self-Feeding Fire
If your fire is struggling, consider which element of the fire triangle may be lacking. If it’s a heat problem, make sure you have enough dry tinder. If it’s fuel, review your choice of wood. Rotten wood holds a lot of moisture and may not burn effectively, whereas punky wood might burn well but it burns quickly.
Choosing the correct sizes of tinder, kindling, and fuel is essential for a well-maintained fire. Tinder should be thin and dry, easily ignited by a spark. Kindling should be small, thumb-thick sticks, while fuel logs should be larger, providing long burn times. Mixing sizes and types of wood can help maintain the balance between quick ignition and enduring burn.
Building a self-feeding fire requires time and effort. It’s not a task to be left until darkness descends. Start preparing your fire early, allowing plenty of time to gather the right materials and to build your fire correctly. This will ensure a warm, dependable fire that will last through the night.
The Last Embers of Wisdom
A self-feeding fire is not just a survivalist’s asset but a testament to the wisdom of outdoor living. It’s an embodiment of preparedness and resourcefulness. Mastering the art of building a self-feeding fire can significantly enhance your experience by freeing up time to take care of other tasks or giving you the ability to get a solid night’s rest.
Like this post? Don’t Forget to Pin It On Pinterest!

Read the full article here