

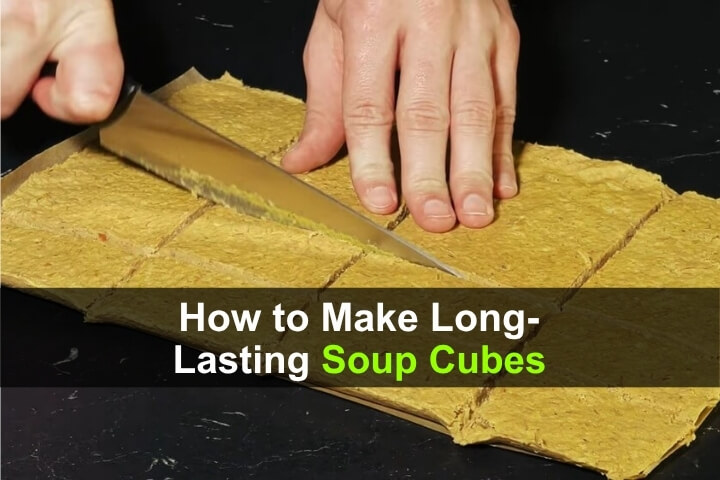

When store shelves went empty in the 1930s, families couldn’t get expensive meat or specialty ingredients. They worked with what was cheap, what was available, and what would stretch the furthest. Out of that necessity came a technique that’s almost too simple to believe: turning a single piece of bone-in beef into frozen soup cubes that can sit in your freezer for more than two years and turn into a hot, hearty meal in about 60 seconds.
This isn’t a trendy freezer-meal hack. It’s a real survival system, and it holds up just as well today as it did nearly a century ago. Whether you’re building a food storage plan, want a backup for hard times, or just like the idea of having real, homemade soup on standby without cans or preservatives, this is definitely worth learning.
Want to save this post for later? Click here to Pin It On Pinterest!
Before getting into the steps, here are a few things worth knowing:
- One cube equals one full portion. Each cube is portioned out ahead of time, so there’s no guesswork later. You always know exactly how many meals you have sitting in reserve.
- No cans, no preservatives, no chemicals. This is just beef, vegetables, butter, and salt. The combination of fat, collagen, and salt is what gives it a long freezer life, not additives.
- It uses the cheapest cut of meat available. Bone-in beef with good fat marbling is inexpensive compared to lean, trimmed cuts, and it actually performs better for this recipe. That matters a lot when you’re trying to build a food reserve on a tight budget.
- One afternoon of cooking produces 20 or more meals. That’s an incredible return on time and money for anyone trying to stock a pantry or freezer against shortages, price spikes, or an emergency where cooking isn’t practical.
- It requires almost nothing to prepare. In a genuine emergency, when time, fuel, or electricity might be limited, being able to pour boiling water over a cube and have a full meal in 60 seconds is a real advantage over recipes that need an hour on the stove.
We actually found this idea on the Youtube channel, Survival Kitchen 1930. You can watch the video and read the recipe below.
What You’ll Need
- 1.5 lbs bone-in beef, with visible fat (avoid lean, trimmed cuts)
- 2 onions, roughly chopped
- 1 carrot, roughly chopped
- A few cloves of garlic
- Butter
- 3 teaspoons of salt
- Hot water (added during blending)
- A blender or food processor (a knife works if you don’t have one)
- A baking dish
- Parchment paper
- Aluminum foil
Step-by-Step Instructions
1. Sear the Beef
Get a pan hot, ideally cast iron, and sear the bone-in beef over high heat. You want a deep, dark crust on all sides. This crust seals in the juices and gives the final broth its color and flavor. Skipping this step results in pale, bland cubes, so don’t rush it.
2. Prep the Vegetables While the Meat Cooks
While the beef is searing, roughly chop two onions and one carrot into large chunks. There’s no need for careful knife work here since everything ends up in the blender later. The onion builds a deep savory base, while the carrot adds natural sweetness, color, and beta-carotene, which becomes especially valuable when food options are limited.
3. Add Garlic and Butter, Then Baste
Once the meat has browned, add garlic cloves directly to the pan along with butter. As the butter melts and the garlic releases its aroma, spoon the hot fat over the top of the meat repeatedly. This bastes the meat from both directions at once, so it cooks evenly and locks in moisture.
4. Place the Meat in Foil
Pull the beef from the pan once it’s done and wrap it tightly in foil for two to three minutes. This step matters more than it seems. Right after cooking, the muscle fibers are tight and the juices are under pressure. Wrapping the meat creates a mini steam bath that lets the fibers relax and the juices redistribute evenly through the meat instead of spilling out when you cut into it.
5. Cook the Vegetables
By the way, don’t wash the pan. The browned bits and juices left in the pan after searing are pure flavor. Leave them in and pour the chopped onion and carrot straight into the same pan to pick up all of that flavor as they cook.
6. Cut the Meat and Combine Everything
Unwrap the rested beef and cut it into small chunks. Add it to the blender along with the cooked onions and carrots.
7. Blend with Hot Water
Pour in just enough hot water to help everything move in the blender, then blend until smooth. You’re aiming for a texture similar to thick porridge, something dense enough to hold its shape once frozen. If it’s too thick to blend, add a touch more water.
No blender? Chop the meat and vegetables as finely as possible with a knife instead, then mix everything together by hand. The texture will be a bit coarser, but the flavor and shelf life stay the same.
8. Add the Salt
Stir in three teaspoons of salt. This isn’t just for taste. Combined with freezing, salt acts as a preservative and is a big part of what allows these cubes to stay good in the freezer for more than two years.
9. Spread the Mixture into a Dish
Line a baking dish with parchment paper so nothing sticks, then pour in the mixture.
Spread it into an even layer, somewhere between half an inch and just under an inch thick. Keeping the thickness even is what allows you to cut consistent, uniform cubes later.
10. Freeze Until Firm, Not Solid
Place the dish in the freezer for about two hours. You want the mixture firm enough to slice cleanly but not frozen all the way through, since a fully solid block is much harder to cut evenly.
11. Cut into Cubes
Once firm, remove the dish and cut the mixture into cubes roughly 2 inches by 1.25 inches. Try to keep every cube the same size. Since one cube equals one portion, consistent sizing means you’ll always know exactly how much food you have in reserve, and you won’t end up with some meals far bigger or smaller than others.
12. Wrap Each Cube Individually
Wrap every cube tightly in foil, one at a time. This protects them from freezer burn and keeps them from picking up odors from anything else in your freezer. Done properly, a cube pulled out six months later should smell like beef, not like whatever else has been sitting nearby.
13. Store and Use as Needed
That’s it. The cubes are ready to go straight into the freezer, where they’ll keep for more than two years.
How to Cook a Cube
When you’re ready to eat, unwrap one cube and pour boiling water directly over it.
Within about a minute, it turns into a thick, dark, aromatic soup with a rich color and a flavor that tastes like it simmered for hours, even though it took 60 seconds.
Nutrition and Yield
One batch made from about 1.5 lbs of bone-in beef, two onions, and a carrot produces 20 to 25 cubes. Each cube comes in around 170 to 200 calories, and because it’s made from real beef, butter, and vegetables, that’s a mix of animal protein, collagen, and natural fats rather than empty calories.
Don’t Throw Away the Bones
Once you’ve pulled the meat for the cubes, save the bones instead of tossing them. Simmered for 12 or more hours, they produce a collagen-rich broth concentrate that’s worth making as its own separate recipe, and it uses up everything left over from this batch so nothing goes to waste.
Like this post? Don’t Forget to Pin It On Pinterest!

Read the full article here